
So you’ve hired a Digital Marketing Agency to get your first Facebook campaign off the ground? Awesome! In this post, we’ll guide you through the process of setting up your Facebook Ad account, including step-by-step instructions for working with the Facebook Business and Ads Manager.
Understanding the potential of Facebook Ads is the first step to getting in front of your target audience. Next up, is setting up campaigns that’ll help you convert those targets into actual customers. So when you finally find the right social media marketing agency to look after your paid ads on the Facebook network, you can easily get the ball rolling.
But before your marketing agency can kick things off and create campaigns to get those leads through your door, you need to get a few things set up and out of the way first. Don’t worry, this is a very straightforward process, we promise. And whilst it might take a moment of your time, it will be incredibly beneficial to your business.
Typically, setting up your Facebook Ad account takes three steps:
- Setting up your Facebook Business Manager,
- Accessing and setting up your Facebook Ad account,
- And setting up a Facebook Pixel.
Facebook Pixels are, simply put, a piece of code that allows you to track visitor activity on your website. Pixels are an incredibly useful tool when it comes to remarketing to people who have checked out your website but haven’t converted yet. Facebook Pixels are extremely cool (ok, as digital marketing geeks we might be biased), and that’s why we’ve dedicated a separate post to them.
We will walk you through each part, step by step. Let’s start with setting up your Facebook Business Manager. If you already have a Business Manager set up, you can jump straight to accessing and setting up your Facebook Ad account.
1. Setting up your Facebook Business Manager
If your business is brand new and you haven’t got your social media sorted yet, you’ll want to create a Facebook Business page first. For your agency to be able to create a campaign, your Business Manager must be connected to a Facebook page. Before you start promoting your business, we do recommend you to put some effort into this page and update it with your business information, contact details, an ‘about us’ story and new images. Publish at least a few posts, so that any visitors you’d like to connect with, don’t land on an empty page.
What is the Facebook Business Manager?
The Facebook Business Manager is a smart tool created to help you manage your page, as well as your advertising efforts. If you have more than one Facebook page, you can access, monitor and update them through one and the same Business Manager. In your Business Manager, you can also control who has access to your Facebook page and Facebook Ad account, grant or remove permissions and assign roles. You can give an agency or individual social media manager access to your Business Manager, too.
What do you need to do?
To create a Facebook Business Manager account
- Hop over to business.facebook.com/overview.
- Click on “Create Account”.
- Enter your business name, your name and email address, then click “Next”.
- Enter your business details and click “Submit”.
To add a new or existing Facebook page to your Business Manager account
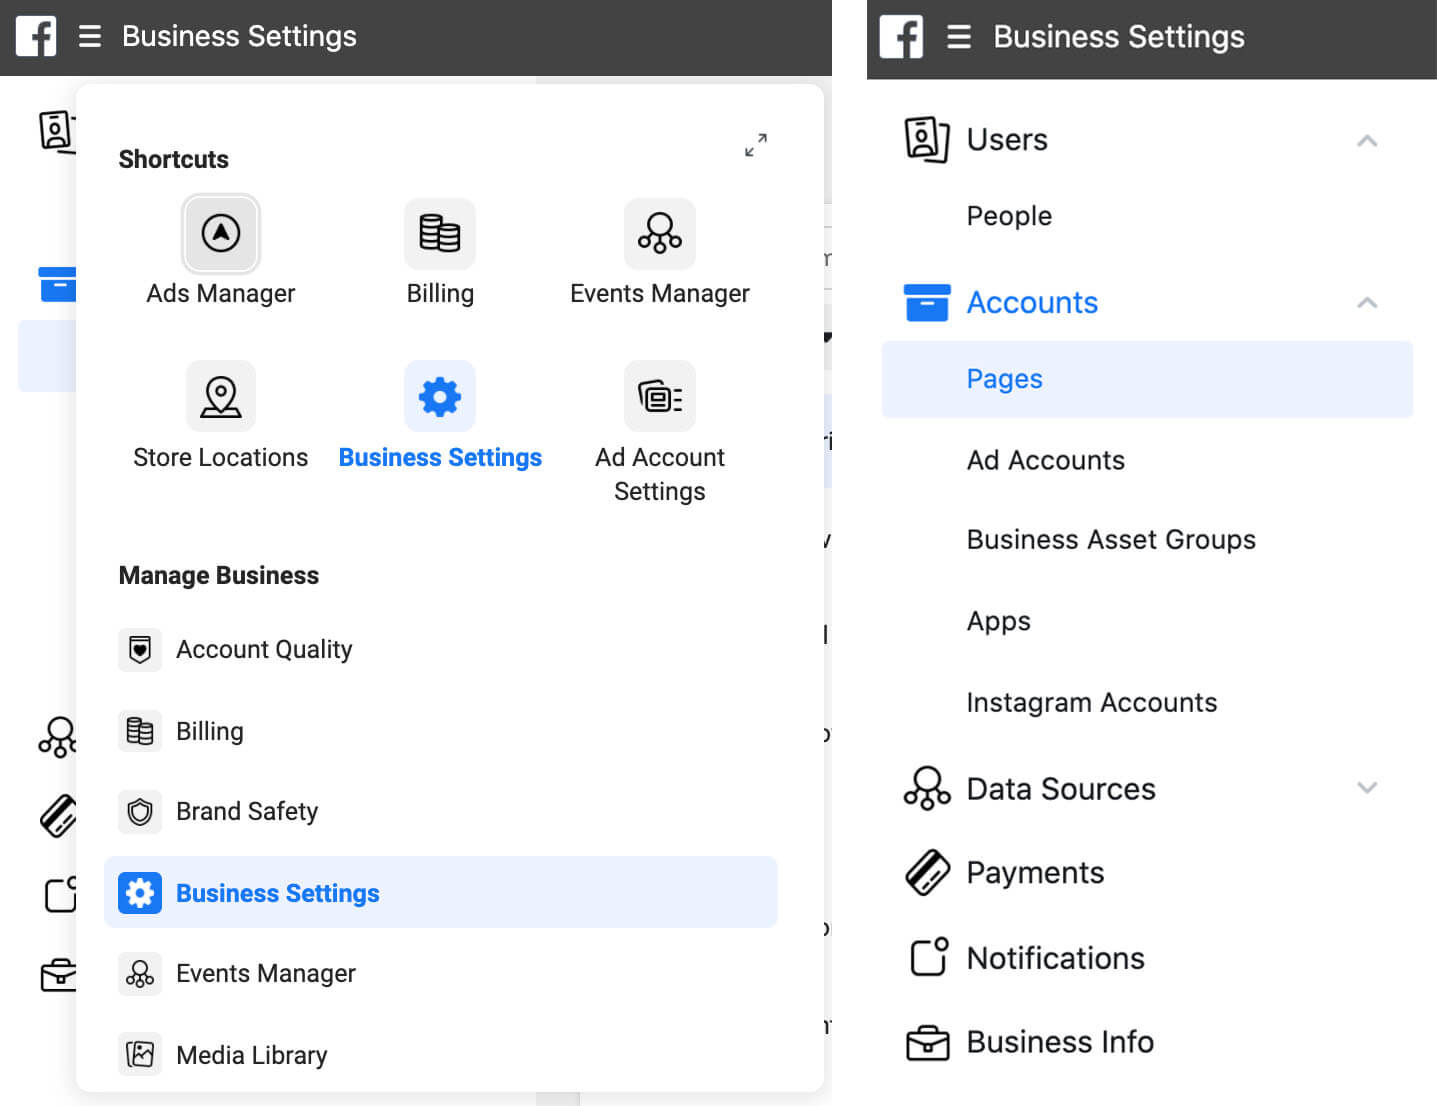
You’ll be able to add Facebook Pages under Business Settings > Accounts > Pages.
- Go to your Business Manager settings.
- On the left, you’ll need to first click on “Accounts”, then continue to “Pages”.
- There, you will see a button that says “Add Page”.
- Choose between three options: “Claim a Page”, “Request Access to a Page” or “Create a New Page”. If you are claiming an existing page, enter the name or URL of your page.
To add an admin to your Business Manager
Let’s talk about this step first. Some might say it’s unnecessary to give your agency admin access to your Business Manager. And yes, theoretically you could assign each asset individually, BUT… (you knew there was going to be a but, right?), it can be time consuming and frustrating for both you and your agency, especially if they have to chase you up about every single thing they need from you. The decision is ultimately up to you, as the client, whether or not to trust your agency with admin access. The ball is in your court!
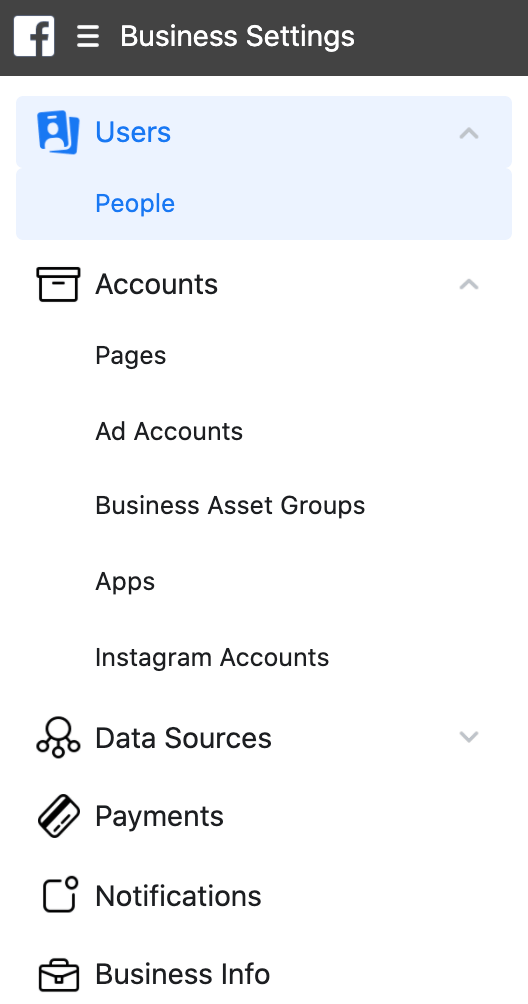
And here is what you need to do:
- Go to your Business Manager settings.
- Under the “People” tab, click on “Add New People” on the right-hand side of the page.
- Enter the email address your agency provided to you. That’s whoever you want to have admin access to your Business Manager.
- Next, assign that email the role of “Business Manager Admin”.
Great work so far! Don’t forget, if you have any questions, you can always get in touch with our Social Media Marketing team here at Anchor Digital. Now, let’s have a look at setting up your Facebook Ad account in the Business Manager.
2. Setting up your Facebook Ad Account
You probably already know this, but we’ll emphasise it again: We run our clients’ campaigns on their own Facebook Ad accounts (as opposed to our agency account) to ensure full transparency and open communication. And whoever you choose to partner with, should do the same. Not only to comply with Facebook's Terms of Service but to avoid confusion, reporting issues and yes, lots of headaches. Running your campaigns on your account has many benefits, including:
- You have immediate, 24-hour access to your account and all campaigns
- You get to keep your Ad account, data and history when you part ways with your agency
- You have full control over your spending and get billed directly
- You have access to real-time reporting features
What do you need to do?
To add a Facebook Ad account to your Business Manager
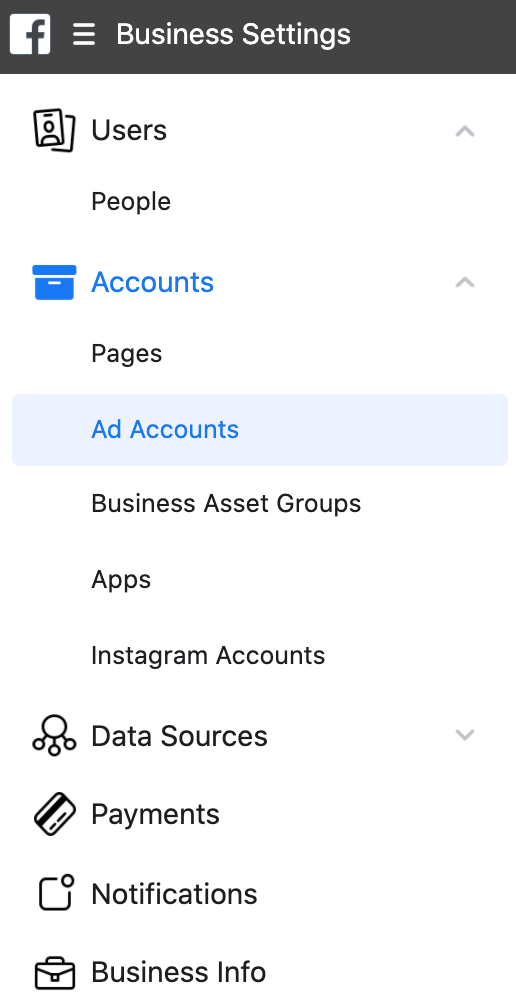
- Again, go to your Business Manager settings.
- On the left sidebar, choose “Accounts”, then click on “Ad Accounts”.
- In the Ad Account column, click on “Add Account”.
- Choose “Create a New Ad Account”.
Note: If you instead choose to request access or claim an existing ad account, enter the ad account ID. Not sure where you can find your Ad Account ID? Have a look at this quick guide! If your agency only requires access to your Facebook Ad account, you will also need to know where to find this ID and then share it with them.
To add your payment details
To get started, you will have to choose a payment method and add your details. Luckily, you’ll only need to do this once. However, if your payment details change, you need to update them immediately or you risk your campaigns being paused.To add our payment method, do the following:
- In your Business Manager, click on your “Business Settings” and go to “Payments”.
- Click “+Add” and enter your payment information.
- Then click “Continue” and follow the instructions to add your payment method.
Facebook accepts multiple payment options depending on your location. In Australia, they include:
- Credit cards (American Express, Mastercard and Visa)
- PayPal payments
Need help? Check out this Facebook guide on payment options explaining in detail how ad billing and payments work. And if you have any questions left unanswered, we’re only a phone call away.

To review your Ad Account Roles
If you’ve been running ads on your own or are switching over to a new agency, you may need to review your Facebook Ad account roles. These roles determine what permissions people on your team or at your agency have and can only be assigned to people who themselves have Facebook accounts.Here are the different types of Facebook Ad account roles you should know:
- Ad account admin - can create and edit, access reports, edit payment methods and manage admin permissions
- Ad account advertiser - can set up and edit ads using the payment method associated with the ad account
- Ad account analyst - can only view ads and access reports
Here is how to add a new user or admin to your Facebook Ad account:
- In “Business Manager Settings”, navigate to “Ad Accounts”.
- Click on your account and you’ll see a list of people with access to your account. If you just set up a new account, this list will be empty.
- Click on “Add People”, to add new users or edit the existing users’ permissions. If you want to remove a person from your account click “Remove User”.
Please note, you have to be a Business Admin in order to change permissions.
To change your Notification Settings
As a business owner, you’ll naturally want to stay informed about relevant updates happening on your Facebook Ad account. Facebook Notifications make it easy to stay well-informed about the progress your agency is making, but of course, a flooded inbox can quickly become overwhelming. If you prefer to do so you can update the frequency of email notifications you receive from Facebook.
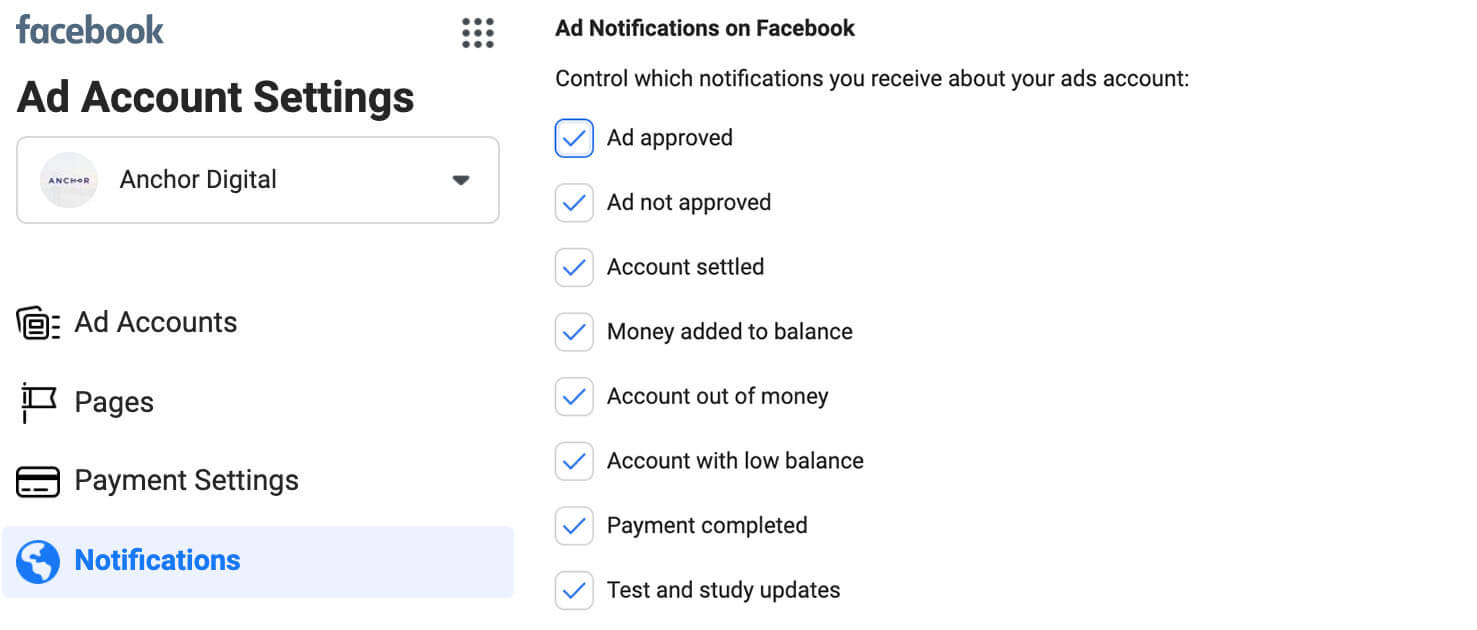
To change your notification settings:
- In your “Business Manager Settings” scroll down to “Ad Account Settings”
- Click on “Notifications”. There you can change your settings for both email and Facebook notifications.
- Change the default setting by removing events you don’t wish to be informed about or turn off notification all together.
Once you’ve completed the Ad account set up and invited your agency, you’re all set. Congratulations, you’ve done a great job! Take a short break, and when you come back, there is only one thing left for you to do: Setting up your Facebook Pixel.
Don’t worry, we’ll also guide you through this process. Remember - constant communication is key and cooperation is necessary for any campaign, project or task to run smoothly. Please don’t hesitate to reach out to us if you have any questions or got stuck along the way. Social media marketing is our daily bread and butter and what we do best, but we understand that it can be intimidating at first. We can’t wait to help you on your journey.


